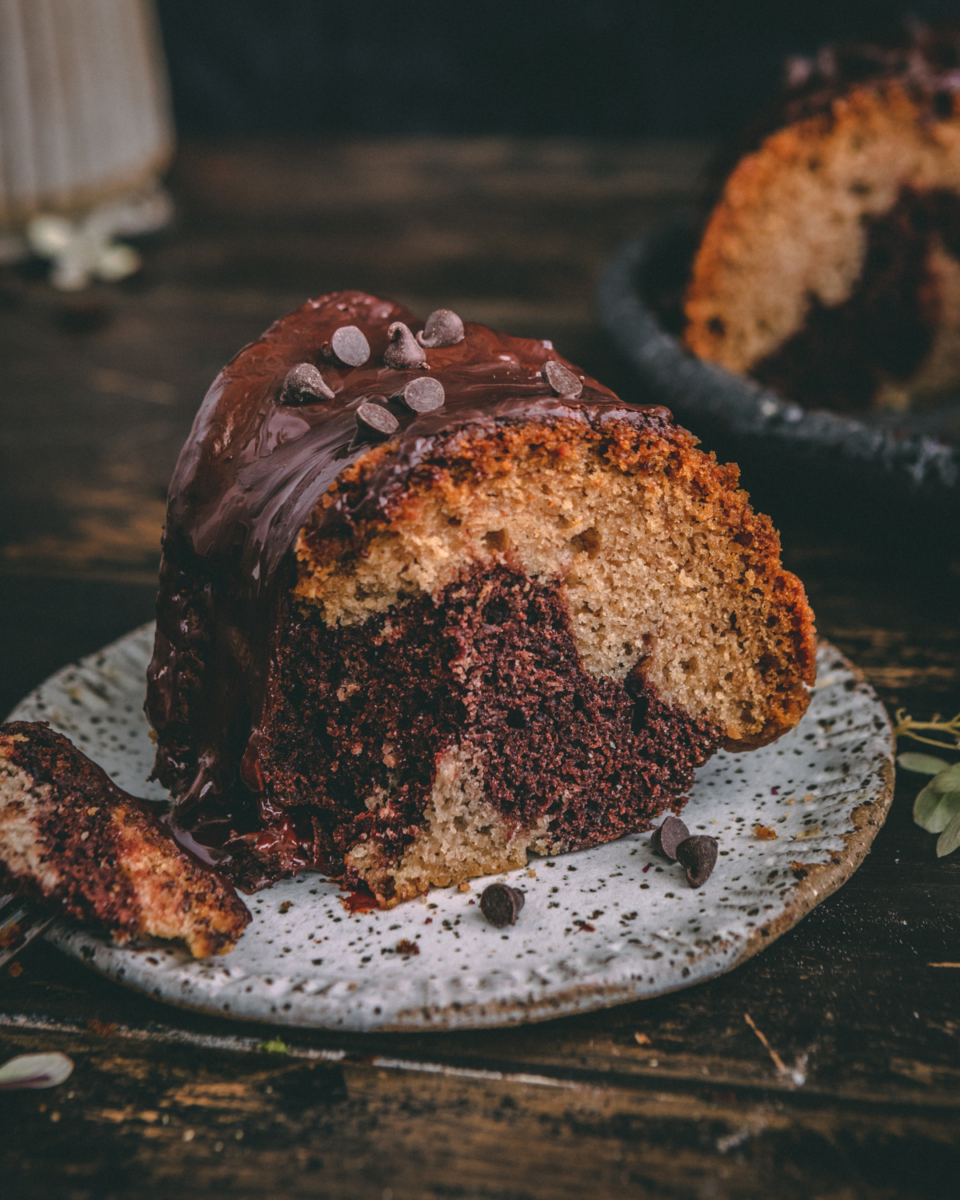
I tell my kids whenever they see something in the bakery to try to make it at home! This marbled bundt cake is a tribute to those coffee shops that have those enticing slices that wish you wanting to have the entire cake to gorge on! Both chocolate with a hint of coffee and vanilla come together in this magical cake! This cake is a definite hit!

Why you’ll love this cake?
- It’s moist!
- it’s half chocolate with more chocolate drizzled on top!
- It’s vegan!
- it’s absolutely beautiful and delicious!
- it’s got a hint of coffee!
- you’ll impress all your friends with this beauty!
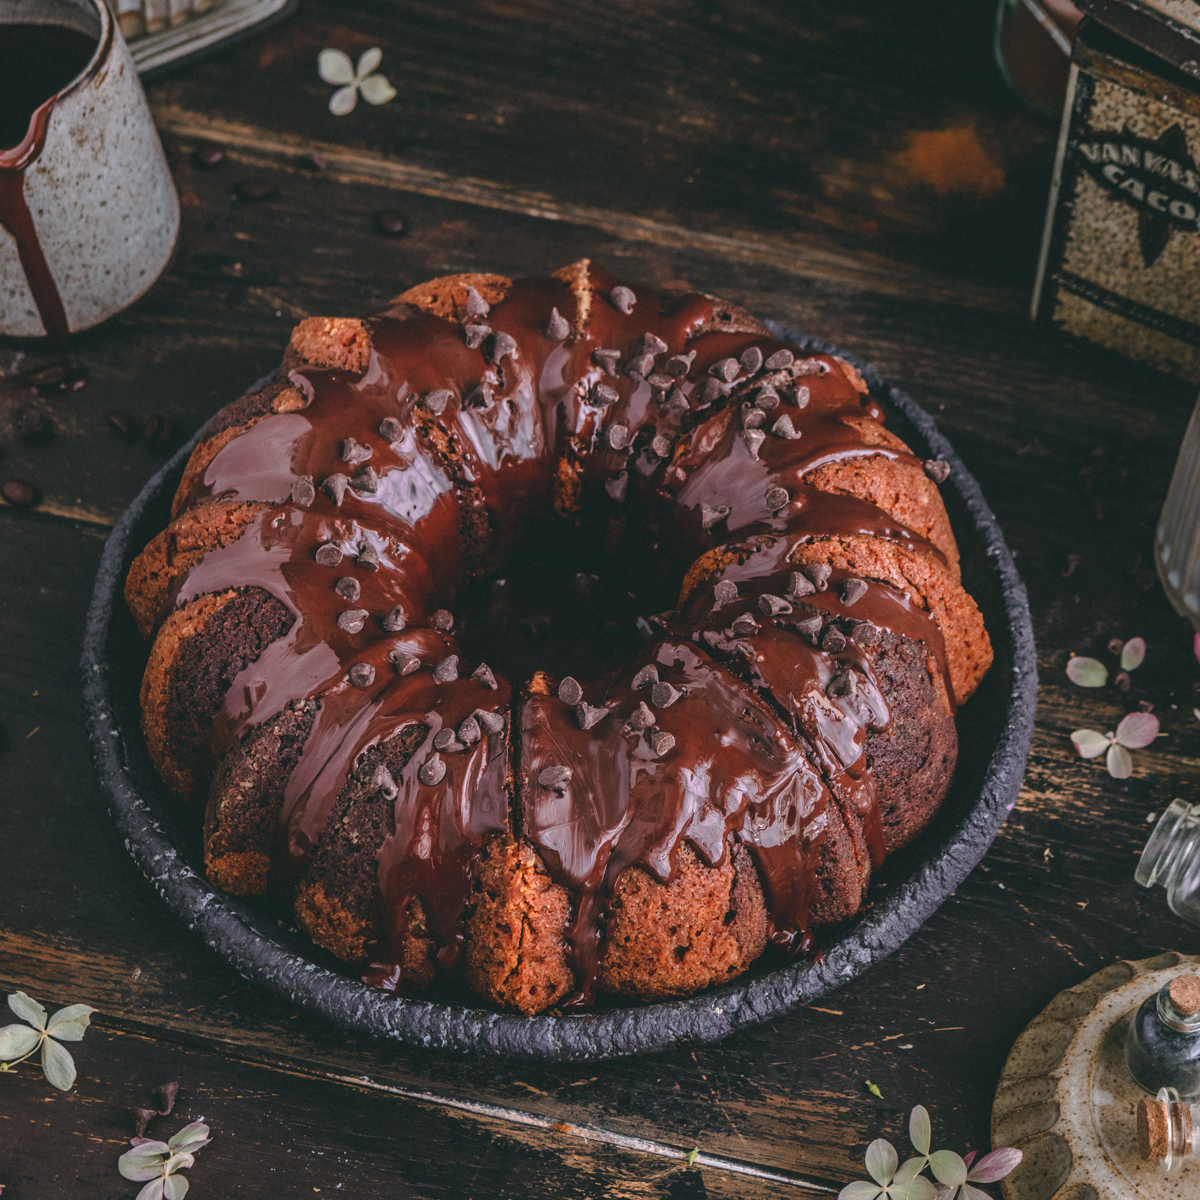
I loved photographing this bundt cake and took it from all angles. There’s just something about bundt cakes that is just so endlessly classic.

What is in the bundt cake?
It’s hard to make vegan cakes because you have to substitute the eggs with something similar. I don’t use flax eggs too often and this cake avoids flax eggs but still retains the moisture that bundt cakes are so famous for! Instead of sour cream, we have a thick Greek style oat yogurt.
This cake can be divided into three parts:

Vanilla pound cake:
This classic vanilla cake can be cooked on its own. It’s got such a beautiful texture. The key ingredients are as follows (Please look below at the recipe card for a full list):
- Coconut oil – this makes the outer cake of the cake crispy (not overly so!) but retains moisture inside. Please make sure the coconut oil is at room temperature or melted slightly in the microwave
- Vanilla – I use vanilla powder
- Oat Greek yogurt – I use Riviera which is the only yogurt in Canada that I’ve seen that has a Greek Style
- Apple sauce – for added moistness but you don’t taste the apple in the cake
Chocolate coffee cake:
The darkness of the cake is attributed to the coffee and cocoa powder! It really elevates this cake and makes it so delicious!
Chocolate glaze:
This is a simple glaze from just melting chocolate. I used a high quality dark vegan chocolate I had gotten from Croatia. I’m sure anything will do just do a test first in a double boiler with a small amount of your chocolate to make sure it melts nicely.
How to make it (step by step)
I’ve included a lot of photos for the success of your bundt cake. Please do take the time to read through everything.
Make sure your coconut oil and everything else that was in the fridge (like apple sauce and yogurt) are at room temperature so your coconut oil doesn’t solidify while mixing and you’ve got a batter that isn’t evenly distributed with its ingredients.
Step 1
This step is pretty easy and shouldn’t be skipped. It’s not enough to spray your bundt cake pan but also sift a bit of flour evenly throughout the pan – especially the little grooves. Here’s an explanation as to why you need to grease AND flour your pan.
Prepping the bundt pan: either use a baking spray or butter the pan well then flour it (baking sprays have both flour and oil in them).
Step 2
Mix together all the wet ingredients in a bowl

Step 3
Fold in the dry ingredients

Step 4
Mix just until combined, don’t over mix!

Step 5
Remove 1.25 cups of batter into another bowl and mix in the prepared coffee and cocoa powder.


Step 6
In a prepared bundt pan (I sprayed and flour dusted mine), dollap your white batter and then dollap your brown batter to make a checkered look to your batter. Fill it around the bundt cake once and then start doing it on top to finish the batter off. Remember to tape the pan firmly to remove air bubbles. I forgot to do this the first time and saw the separation of the lines.

Take a long skewer or a toothpick, start swirling your batter to mix your two tones. This will result in your cake looking marbled. Please note that if you overdo it then it’ll look just a messy cake without any marbling streaks.
Alternatively you can layer it horizontally to create a full layer on top of the vanilla. Then chocolate. Then vanilla. You can do one layer or two layers of chocolate ending with the vanilla layer on top. You wouldn’t necessarily need to swirl it but do remember to tap the pan to remove air bubbles.

Step 7
Bake your cake for 45-55 minutes or until a toothpick comes out clear from near the centre of the cake. Please allow the cake to cool completely before glazing it. You could pop it into the fridge or freezer if you’re in a rush. In fact, having the cake cold will alway the glaze to set quicker.

Glazing your masterpiece
This glaze doesn’t have any plant based milk. I just took good quality vegan chocolate and melted it to use as a glaze on top. I also polished the look off with some mini chocolate chips.


Glazing How-To
You can simply take your melted chocolate and use a spoon to drizzle it on top. I poured it into a pouring cup and slowly just went back forth around the circle taking the time to let it flow the cake’s edges. You could also use a piping bag, which may give you more control over the drizzle.
Alternatives for this cake
There are a few tweaks you could do for this cake such as:
- adding mini chocolate chips to the batter
- adding a streusel to the top instead of melted chocolate
- put the batter in a mini bundt cake pan and reduce the time to about 30 minutes.
- I haven’t tried a gluten free option but you can sub the flour for a gluten free 1:1 one.
- you can add freeze dried raspberry and strawberries
- you can also add some fruits like wild blueberries or lemon zest as well if you enjoy some citrus in your chocolate
Helpful Tips
Waiting too little or too long
I know it’s super tempting to turn the bundt pan over after it’s cooked to reveal the beautiful cake but try not to do within the first 5 minutes. It’ll break and fall apart. On the other hand, don’t wait too long and let it cool as the cake will most definitely stick to the inside of your pan.
Investing in a good pan
Always get a good quality pan, especially if it’s something you see yourself using in the future. There’s a reason, sometimes, that you pay a little bit more for a quality product.
Room temperature ingredients
Make sure your ingredients are at rom temperature. The yogurt and the coconut will clump and not make for an even batter.

Storage options
Your cake will be fine on the counter for up to 3 days in an air tight container. It can also be placed in the fridge for up to a week. But, be warned that this may result in a bit of drying despite your best efforts to keep it tightly secured in a container. Perhaps plastic wrapping it and then putting it away inside something will help, but I don’t want to use excessive waste.
Freezing is also an option as you can place this in the freezer for up to 3 months. Allow it to come to room temperature and then microwave it to your desired warmth.

Enjoying this cake? Here are some more!
- Easy and Moist Chocolate with Blueberry Icing
- The Best Gluten Free Blueberry Lemon Poppyseed Cake
- Amazing Pineapple Coconut Cake with Passionfruit Drizzle
- Easy and Moist Carrot Cake with Blood Orange Jam

Marbled Chocolate Coffee Bundt Cake
Equipment
- 1 Stand alone mixer
- 1 bundt pan 10 cup size
Ingredients
- 1 1/2 cups white granulated sugar
- 3/4 cup coconut oil melted
- 1/2 tsp vanilla powder
- 1 1/2 cups yogurt vegan oat greek style
- 3/4 cup apple sauce
- 2 1/4 cups flour
- 1.5 tsp baking soda
- 2 tbsp cocoa powder
- 1 tsp coffee granules
- 2 tbsp water
Chocolate glaze
- 8 oz dark chocolate melted, vegan
Garnishes
- 2 tbsp mini chocolate chips optional
Instructions
- Preheat your oven to 375 F. Prepare a bundt cake pan with oil and sifted flour sprinkled on top
- In a bowl, mix together the sugar and the coconut oil. Add in the vanilla powder, yogurt, and apple sauce until well combined. I would let it mix together in a stand alone mixer for a few minutes
- Fold in the flour and baking soda to the wet ingredients. Don't over mix. Pause to scrap down the bottom and sides of the bowl to ensure an even mix.
- In a separate bowl, remove 1 1/4 cups of batter. Mix in the coffee granules prepared with the two tablespoons of water and then add cocoa powder.
- In the bundt pan, spoon out white batter, alternating with the chocolate batter and then swirl it using a long wooden skewer. Alternatively you can layer it horizontally to create a full layer on top of the vanilla. Then chocolate. Then vanilla. You can do one layer or two layers of chocolate ending with the vanilla layer on top.
- Bake for 45-55 minutes, or until cooked through using a
- When the cake is cooled completely, top with glaze and enjoy!
Nutrition
© sculptedkitchen.com. All content and images are protected by copyright. Please share this recipe using the share buttons provided. Do not screenshot or republish the recipe or content in full. instead, include a link to this post for the recipe.
